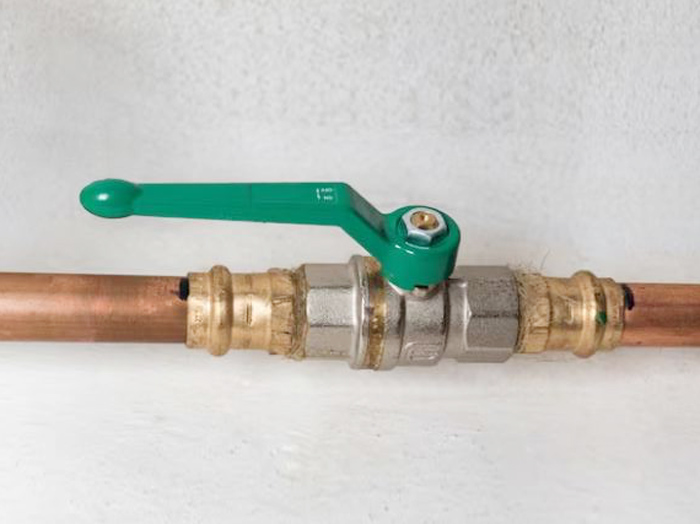
Are you looking to connect copper pipes but not sure where to start? Connecting copper pipes may seem like a daunting task, but with the right knowledge and techniques, it can be a straightforward process. Whether you are a seasoned DIY enthusiast or a beginner, this article will guide you through the steps of connecting copper pipes effectively.
In this comprehensive guide, we will discuss the different methods of connecting copper pipes, including soldering, compression fittings, and push-to-fit connectors. We will also cover the tools and materials you will need for each method, along with detailed step-by-step instructions.

Tools and Materials Needed for Connecting Copper Pipes
Before you start connecting copper pipes, it’s important to gather all the necessary tools and materials. Here’s a list of items you’ll need:
- Copper pipes: Measure and cut the pipes to the required length using a copper pipe cutter.
- Fittings: Depending on the method you choose, you will need the appropriate fittings such as solder fittings, compression fittings, or push-to-fit connectors.
- Flux: Flux is used in soldering to clean the copper pipe surface and promote better adhesion.
- Solder: Solder is a metal alloy used to create a strong bond between copper pipes.
- Pipe cutter: A pipe cutter is essential for cutting copper pipes accurately.
- Deburring tool: After cutting the pipes, use a deburring tool to remove any sharp edges or burrs.
- Cleaning cloth: A cleaning cloth is used to wipe away excess flux and solder.
- Heat source: For soldering, you will need a propane torch or a soldering iron.
Now that you have all the necessary tools and materials, let’s explore the different methods of connecting copper pipes.
Types of Connections for Copper Pipes
There are three main methods for connecting copper pipes: soldering, compression fittings, and push-to-fit connectors. Each method has its own advantages and disadvantages, and the choice depends on the specific requirements of your project.
Soldering
Soldering is the traditional method of connecting copper pipes. It involves heating the joint and applying solder, which melts and forms a bond, creating a leak-proof connection. Here are the steps to soldering copper pipes:
- Cut the copper pipes to the required length using a pipe cutter.
- Use a deburring tool to remove any sharp edges or burrs from the cut ends of the pipes.
- Apply flux to the outside of the pipe and the inside of the fitting.
- Insert the pipe into the fitting until it reaches the stop.
- Heat the joint using a propane torch or a soldering iron until it’s hot enough to melt the solder.
- Apply solder to the joint, allowing it to flow around the connection.
- Wipe away any excess flux and solder using a cleaning cloth.
Soldering provides a strong and durable connection, making it suitable for both hot and cold water applications. However, it requires skill and practice to achieve a perfect solder joint.
Compression Fittings
Compression fittings are a popular choice for connecting copper pipes as they don’t require heat or solder. Instead, they use a compression nut and ring to create a tight seal. Here’s how to use compression fittings:
- Cut the copper pipes to the required length using a pipe cutter.
- Use a deburring tool to remove any sharp edges or burrs from the cut ends of the pipes.
- Slide the compression nut and ring onto the pipe.
- Insert the pipe into the fitting until it reaches the stop.
- Tighten the compression nut using an adjustable wrench until it forms a watertight seal.
Compression fittings are easy to install and can be disassembled if needed. However, they are bulkier than soldered connections and may not be suitable for tight spaces.
Push-to-Fit Connectors
Push-to-fit connectors, also known as push-fit or quick-connect fittings, are the simplest and quickest method of connecting copper pipes. They feature a push-fit design that requires no tools or additional materials. Here’s how to use push-to-fit connectors:
- Cut the copper pipes to the required length using a pipe cutter.
- Use a deburring tool to remove any sharp edges or burrs from the cut ends of the pipes.
- Push the pipe into the fitting until it clicks into place.
Push-to-fit connectors provide a secure and reliable connection and can be easily removed if necessary. However, they may not be suitable for high-pressure applications.
Now that you are familiar with the different methods of connecting copper pipes, let’s dive into the step-by-step instructions for soldering copper pipes.
Steps to Soldering Copper Pipes
Soldering copper pipes requires precision and attention to detail. Follow these step-by-step instructions to achieve a successful solder joint:

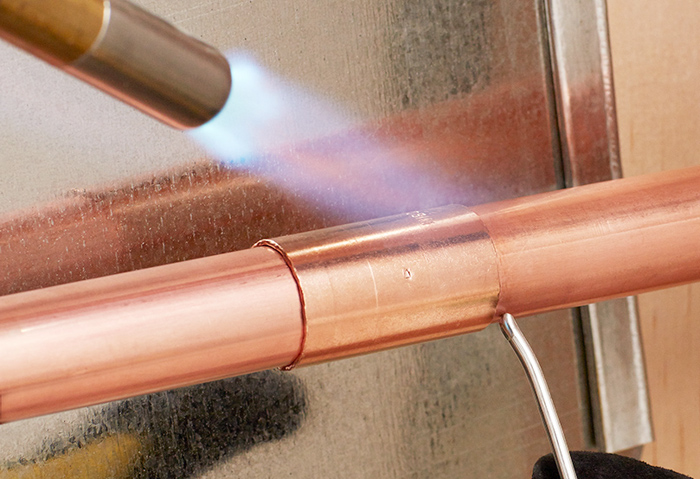
Image by lnsturnkey
- Cut the copper pipes to the required length using a pipe cutter. Ensure that the ends are clean and free from burrs.
- Use a deburring tool to remove any sharp edges or burrs from the cut ends of the pipes. This will ensure a smooth fit.
- Apply flux to the outside of the pipe and the inside of the fitting. Flux helps clean the surface and promotes better adhesion.
- Insert the pipe into the fitting until it reaches the stop. Make sure the joint is tight and properly aligned.
- Use a propane torch or a soldering iron to heat the joint evenly. Move the flame around the joint to distribute the heat.
- Once the joint is hot enough, apply solder to the joint. The solder should melt and flow around the connection.
- Allow the joint to cool and solidify. Avoid disturbing the joint during this process.
- Once the joint is cool, wipe away any excess flux and solder using a cleaning cloth. This will give the joint a clean and professional appearance.
Proper technique and practice are essential for achieving a successful solder joint. Now let’s explore some tips for successful soldering.
Tips for Successful Soldering Copper Pipes
Soldering copper pipes can be challenging, but with these tips, you’ll be able to achieve professional results:
- Cleanliness is key: Ensure that the pipes and fittings are clean and free from dirt, grease, and oxidation before applying flux and solder.
- Heat control: Use a propane torch or soldering iron with adjustable heat settings to control the temperature. Too much heat can damage the pipes, while too little heat may result in a weak joint.
- Proper flux application: Apply flux evenly to the pipe and fitting to ensure maximum adhesion. Excess flux can cause solder to flow unevenly and create weak spots.
- Use the right solder: Choose the correct type of solder for your specific application. Lead-free solder is recommended for potable water systems.
- Avoid overheating: Heat the joint evenly and avoid overheating, as it can cause the solder to melt and flow away from the joint.
- Practice on scrap pieces: If you are new to soldering, practice on scrap pieces of copper pipe before working on your actual project.
Remember, practice makes perfect, and with time, you will become more proficient in soldering copper pipes. However, soldering is not the only method for connecting copper pipes. Let’s explore some alternative methods.
Alternative Methods for Connecting Copper Pipes
In addition to soldering, there are alternative methods for connecting copper pipes that offer simplicity and versatility. Here are a few options:
- Compression fittings: Compression fittings use a compression nut and ring to create a watertight seal. They are easy to install and can be disassembled if needed.
- Push-to-fit connectors: Push-to-fit connectors allow for quick and tool-free installation. They provide a secure and reliable connection and can be easily removed when necessary.
- SharkBite fittings: SharkBite fittings are a type of push-to-fit connector that utilizes a unique O-ring and stainless steel teeth to create a secure connection. They are suitable for both copper and PEX pipes.
These alternative methods offer convenience and flexibility, especially for DIY enthusiasts who prefer a simpler approach. However, it’s important to consider the specific requirements of your project before deciding on the connection method.
Common Mistakes to Avoid When Connecting Copper Pipes
When connecting copper pipes, it’s crucial to avoid common mistakes that can compromise the integrity of the connection. Here are a few mistakes to watch out for:
- Improper pipe preparation: Failing to properly clean and deburr the pipes can lead to leaks and weak joints.
- Inadequate flux application: Applying too little or too much flux can affect the quality of the solder joint. Use a thin, even layer of flux for optimal results.
- Overheating the joint: Excessive heat can damage the pipes and fittings, resulting in leaks or weakened connections. Take care to apply the right amount of heat during soldering.
- Poor alignment: Misaligned pipes and fittings can lead to leaks and compromised connections. Ensure that the pipes are properly aligned before soldering or using alternative connection methods.
By avoiding these common mistakes, you can ensure a secure and long-lasting connection for your copper pipes.
Safety Precautions When Working with Copper Pipes
Working with copper pipes involves heat and potentially hazardous materials. Here are some safety precautions to follow:
- Use protective gear: Wear protective gloves and safety glasses to protect yourself from hot surfaces, flux, and solder.
- Work in a well-ventilated area: Soldering produces fumes that can be harmful when inhaled. Ensure that you’re working in a well-ventilated area or use a fume extractor.
- Keep a fire extinguisher nearby: In case of a fire, have a fire extinguisher readily available.
- Use caution with heat sources: Take care when working with propane torches or soldering irons to avoid burns or starting a fire.
- Follow manufacturer’s instructions: Always read and follow the manufacturer’s instructions for the tools and materials you’re using.
By following these safety precautions, you can minimize the risks associated with working with copper pipes.
Maintaining and Repairing Copper Pipe Connections
Once you have successfully connected your copper pipes, it’s important to maintain and periodically inspect the connections for any signs of wear or leaks. Here are some tips for maintaining and repairing copper pipe connections:
- Periodically check for leaks: Regularly inspect the connections for any signs of leaks, such as water stains or dampness.
- Repairing leaks: If you notice a leak, you may need to repair the connection. Depending on the method used, you may need to remove and replace the fitting or re-solder the joint.
- Preventing corrosion: Copper pipes can corrode over time. Consider using dielectric unions or isolating fittings to prevent corrosion where copper pipes connect to other metals.
- Insulate pipes in cold climates: In colder climates, insulate the pipes to prevent freezing and potential damage.
By properly maintaining and promptly addressing any issues, you can ensure the longevity and reliability of your copper pipe connections.
Conclusion
Connecting copper pipes may seem intimidating at first, but with the right knowledge and techniques, it becomes a manageable task. In this article, we’ve explored the different methods of connecting copper pipes, including soldering, compression fittings, and push-to-fit connectors. We have discussed the tools and materials needed for each method, along with detailed step-by-step instructions.
Remember to choose the connection method that best suits your project’s requirements and consider factors such as durability, ease of installation, and accessibility. By following safety precautions, avoiding common mistakes, and properly maintaining your connections, you can achieve secure and long-lasting copper pipe connections.
Now that you have a comprehensive understanding of how to connect copper pipes, it’s time to put your knowledge into practice. With the right tools and techniques, you will be able to tackle any copper pipe connection project with confidence.
